Welcome back once again to Simple Writing Lessons for the Primary Grades, a 12-week collaborative writing series, hosted by The Measured Mom and This Reading Mama (that’s me)! If you have missed any of the lessons we’ve covered so far, click here to see the introduction and links to the lessons (links are at the bottom of the post).
Simple Writing Lesson #8: Re-read your writing {a revising strategy}
Time is one of a writer’s best friends {and worst enemies}. One way that time can be helpful is it gives the writer a chance to gain a fresh perspective on his writing. This is true throughout the writing process, but is especially true when it comes to revising.
When writers revise, they are looking for places where the meaning has broken down and needs to be repaired. Sometimes this means changing words, adding words, or subtracting words. Most young readers don’t particularly care for revising their own writing {neither do older writers, if I must be honest} because they tend to want to keep everything they’ve written. Or when they re-read their writing immediately after they’ve written it, it makes sense to them, so they see no need to revise it. They need a strategy to help them figure out what needs to be changed in their own writing. That’s where our next simple writing lesson comes in. It helps to answer:
“How do I find what needs to be changed?”
(Note: I am sharing examples from my son’s writing in 2nd grade. This same lesson can easily be adapted for students in any grade, if they are developmentally ready for it.)
How to teach it:
1) Prepare your materials.
- Your child should have a pencil and a piece of paper or a notebook to write in.
- Time: You need at least 2 day’s worth of time gone by since your child last worked on this piece.
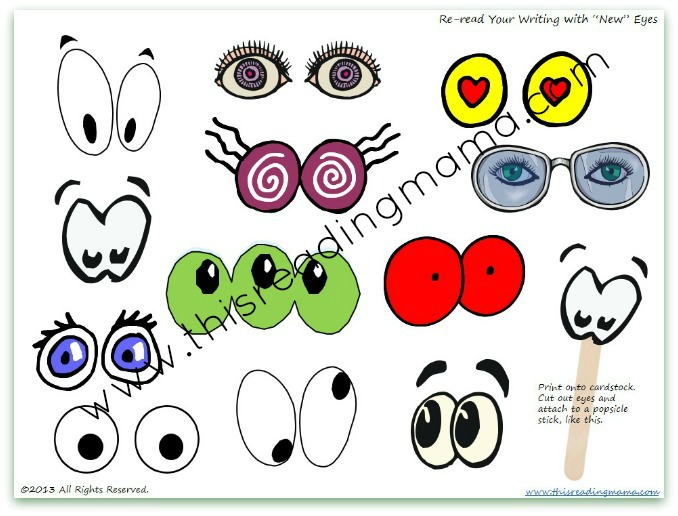
- Pair of “new eyes” on a popsicle stick {we’ll get to that in a minute}
2) Demonstrate how to revise in your own writing.
{I demonstrated by using the rough draft of my latest Phonics by The Book reader. I was writing it at the time. If you have a text you’ve written, even a letter to a friend, you can demonstrate how you go back and revise for meaning.}
“I’ve been working on this story about the prophet Samuel for a few days now. A couple of days ago, I finished writing it and I’ve had some time to step away from it. Now that I’ve had some time away from the story, I’m going to go back and re-read it. My eyes and brain have had a chance to rest from my story. Now, I’m going to go back and re-read it with new eyes.” I show him my “New Eyes” {see download below} and a huge smile breaks out across his face.
When writers take time away from the text, it helps them to look for meaning a bit better when they re-read than if they do it the same day or moment that they just finished their writing. There’s something about stepping away from the text that literally gives you “new” eyes for meaning and revision.
 {download the free “new eyes” HERE}
“As I re-read it, I’ll be looking for places where it might not make a lot of sense…places where I can change a word, take out a few words, or add words.” {I did this only with a couple of paragraphs; not my entire text. I start reading at the beginning.}
I read aloud so he can hear my piece. In the second paragraph, I get to place where I think my readers may get confused. “Hmmm…I think I need to add something here so my readers will know where Hannah is bringing her baby back to. It just says, ‘bring him back’. I’m going to add, ‘to the temple to live’.”
 As I keep reading, I again realize that I mentioned a new character in the story without explaining who he was, which may confuse my readers. I say, “I don’t tell my readers who Eli is. They need to know that. I’m going to add, ‘the priest’ in there so it’s not so confusing.” He agrees.
3) Ask the child to Use this Revising Strategy ~ Re-read with “New Eyes”.
“Now, let’s look at this piece that you finished writing {last week} and re-read it with new eyes. Let’s look for places where it may be confusing for your reader.” As your child reads, chime in if you find places where the meaning breaks down for you as the listener. You can do this in a non-confrontational way by asking questions like “What do you mean right here?”

Please note three things when it comes to revision:
- Revision takes a lot of time and a lot of practice. And I’m not sure revision is mastered by many children, let alone adults! But, it is good to introduce it to them and practice it together.
- Keep the reader in mind: Will the reader understand? Will it be confusing to the reader?
- Their revisions are going to be different than ones we’d make. They will be developmentally appropriate for them. One revision that is particularly hard for young writers is omitting information. That typically comes last in writing development.
4) Wrap up the lesson.
“After you’d have time to step away from your writing. Go back and re-read it, thinking about your reader. Use your ‘new’ eyes to look for places your reader may get confused and change those places by adding or taking away part of your writing.”
This is the eighth lesson in a 12-part series for Primary Grades. Click HERE or the image below to view more simple writing lessons.
~Becky

Great lesson that many adults including myself can use. One big problem I noticed with my daughter is that her handwriting is still not very established and then she doesn’t have space to insert her revisions resulting in a frightful mess on the page. Do you have any advice for that?
Great question and I meant to cover that in the post {couldn’t find a great place to insert it}. My son has a writer’s notebook {wide-ruled paper} and he writes on every other line, leaving a blank line in between his writing lines. We can use the blank space for revisions and editing. I hope that helps. 🙂
Lucy Calkins calls this writing for readers, and the plan is revise, revise, revise. However, your cute plan is quick, effective, helpful, and gets right to the point. I would think in homeschool, there could be a mom, dad, grandma, or other family member photo on the end of the stick—if the child needs more direction.
Very clever! Fun!
What a cool idea.
Another great post in this terrific series. Love the ‘new eyes’! I’ve also seen a pile of coins used as part of a revision technique. A pile of coins is placed on the left side of the table. With each correction/adjustment made, one coin is moved from the left side of the table to make a new stack on the right side of the table. The idea is to move as many coins as possible in order to polish the writing. Perhaps this would work in conjunction with the ‘new eyes’ for older children? As an adult, I often struggle with revising my own writing (as you’ll probably realise if there are mistakes in this comment that I haven’t found! :o) Thanks for sharing.
Love the coin idea! Yes, revision is a life-long journey, isn’t it?
I was wandering around Pinterest and found this. As a 2nd grade teacher who just tried to do some editing and revising with my class, your CUPS idea will be a perfect addition. Thanks so much for sharing.
Sara