Orthographic mapping with sight words. It sounds like such a technical and confusing idea, right? I know it was the first time I saw the term.
But after close study, I’ve come to see that it isn’t as complicated or intimidating as I first thought. And I’d actually been doing it with my struggling readers for years, but didn’t know it had a name. I just knew it worked.
Read more Tips for Teaching High Frequency Words.*

*Note: I’m using the term “sight word” and “high frequency word” interchangeably in this post, although technically, they mean something different.
What is Orthographic Mapping, Anyway?
You’ve probably heard the expression “map it out” before. Simply put, it means that we lay things out in an explicit way to remember something better. Maybe we make a timeline, a list, or even draw a map.
That’s exactly what we’re doing with orthographic mapping. Since the English language is a phonetic language, we can use that to our advantage. We can map out a word and its spelling in an explicit way to help learners remember the word easier the next time they see it {instead of just memorizing it as a whole.}
If you think about the literal meaning of orthographic, “ortho” means straight, right, or correct and “graph” means to write. So, orthographic mapping is the process we use to help learners correctly “write” words so they can store them into their long-term memory.
Simply put, we take a word and help learners see how the graphemes {letters/letter chunks} and the phonemes {letter sounds} work together in a certain order to spell out a word.
For example, we can map out the word sheep like this:

Why is Orthographic Mapping Important?
Instead of just trying to memorize words {because our brain can’t hold that many word “pictures”}, orthographic mapping allows learners to use the phonics and phonemic awareness they know to make connections with words. We are encouraging their brains to look for patterns in the word, something our brain is designed to do, when we map words.
It’s similar to what we do when teaching other skills. For example, with comprehension skills, we ask our learners to connect to what they know in order to help them make predictions, infer, or synthesize. In math, we encourage learners to think about their addition facts to help them master their subtraction facts. We show them how they are related.
Orthographic mapping is multi-sensory, as learners see the word, say the sounds in the word, and interact with the word by writing or coloring. {See the four ideas for mapping below.}
How to do Orthographic Mapping with Sight Words
It’s one thing to orthographically map a word like cat. I mean it’s nice and neatly packaged for readers because every letter {grapheme} matches perfectly to a single sound {phoneme}.
It’s another ballgame to do orthographic mapping with those sometimes pesky sight words/high frequency words. To be completely honest, some words just don’t play nice.
So, what can you do? You still map them out!
1. Like the word cat, many sight words fall into the 100% predictable category. This means every letter/or letter chunk can be matched to a predictable sound. Take for example and, but, it, in, up, and with, just to name a few. All of these words have predictable letter sounds and can be mapped 100% to sounds just like a phonics word.
2. All other sight words {expect the word of} have predictable parts. This means that at least part of the sight word follows predictable phonics rules. This makes them a little trickier to map, but here are four ways you can help your learners map them.
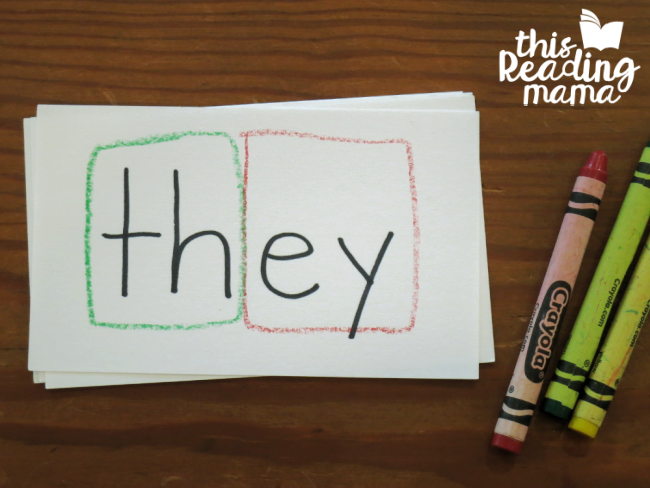
1. Color Code the Word – You can have learners use colors to circle/box the parts of the word. I like to use green for the predictable parts and orange/red for the unpredictable parts. For example, in the word they, the TH makes a predictable sound while the EY doesn’t {usually, it’s AY}.
If you have older learners, they may prefer to highlight the letters. Learners can also underline the parts in color code. The point here is that the different colors help learners remember the easy parts from the tricky parts.
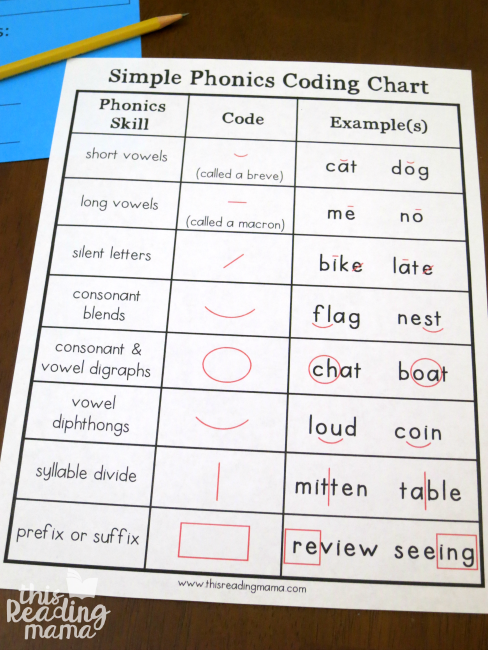
2. Code the Word – Coding might sound like a complicated process, but if you teach just a few symbols for coding {you can even create some of your own}, it’s not hard to do. A word such as like might have a macron {this symbol: -} over the i and a slash through the silent e.
See my post, Teaching Phonics Coding, for other coding ideas and to download the chart seen in the above image.

3. Write the Expected Spellings – Help learners break apart the chunks in words and write the expected spellings. You can see the example in the image above.
Instead of THEY for they, learners might write THA {or THAY} to remember the sounds. For a word like was, they might write WUZ.
Of course, you don’t want them to learn the wrong spellings, but it’s helping them to map which letters/chunks are predictable, which ones aren’t so they can connect what they see to the phonics/phonemic awareness they know.

4. All of The Above – I always hated having this option on a multiple choice test, but “all of the above” is a great thing when it comes to mapping sight words.
If you can orthographically map sight words using color, coding, and expected spellings {as seen in the image above}, it really packs a punch!
You May Also Like:

Enjoy teaching!
~Becky
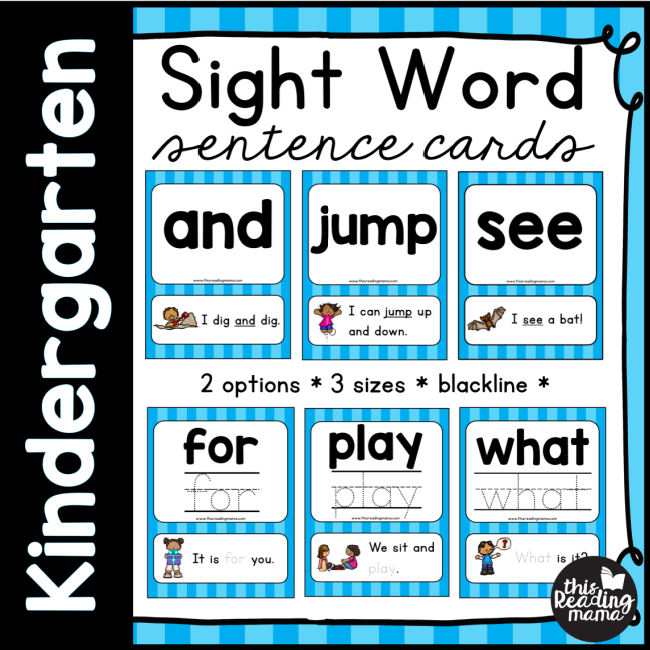
You Might Like our Kindergarten Sight Word Sentences Cards…
with MORE cards to come!
That brings back memories of Grade Three spelling flash cards, for me! Spelling was always a struggle for me as a student, but color-coding was something I did connect with.
This post is a great help! I used the orthographic mapping sight word printable with the fat hollow letters. I wanted to use the editable cards to add in all the leap words from All About Spelling and All About Reading, but every time I try to type the new words in, it tells me that I do not have permission to edit. I have downloaded the correct font. I am using an completely updated iPad. So do you have any suggestions? It lets me type in one letter and then tells me I don’t have permission to edit.
My only idea is to make sure you’re opening with Adobe Reader. Honestly, I’ve never tried to edit using an iPad, so I hope the Adobe Reader tip does the trick for you!
I’ve been teaching special education students for 23 years. I used to put pictures or what the letters really sound like on the word cards. Ive gotten away from that. I haven’t done the word cards since I started going into 3-5 classrooms. It doesn’t feel like their is time to do that. I am trying so hard to get them to keep up with the gen. ed. classroom. I’m so glad I saw your post. Thank you,