Once my students had a broader view of nonfiction, it was time to dive into some nonfiction text features (such as captions, maps, photographs, etc.).
I’ve found that students tend to skip over text features and stick to reading the text only. But text features are put there for a specific purpose by the author: to help the reader better understand what he or she is trying to convey. Paying attention to these can greatly help students comprehend what they are reading. (These lessons also tied in beautifully with determining importance in text, so I integrated this comprehension strategy throughout our study of nonfiction features and structures.)
Before Reading: We looked through the text feature hand-out I adapted from Reading with Meaning and we discussed each one. Some of these features are very familiar to even the youngest of readers (such as maps, photographs, etc.), but other features (such as graphics, captions, or labels) may not be. For the less familiar features, I brought in texts that had the features so the students could see them in action.
During Reading: I picked a fun text (such as how to make a fortune teller) to have the student read and do–I actually used my handy, yet old Childcraft books during tutoring.
- I pulled out words for each student that I thought would be difficult to read and introduced those.
- We read through the text first, mostly for decoding purposes.
- Then, the student read through step-by-step and she made the fortune teller. I had all the materials needed for the student to make it.
After Reading: We looked back through the text and discussed the text features that the author chose to use. Some questions we explored: What text features did the author use? Were they text helpful? Why or why not? Are there any other text features you would have included to make it easier to understand? Why do you think the author didn’t use (insert one of the other text features) in this text?
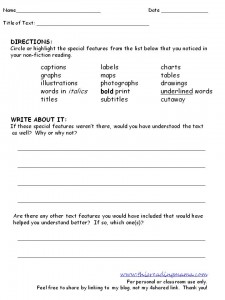
Extension-Homework/Indepedent Practice: As indepedent work, I gave my student another non-fiction text on her independent reading level (like a Time for Kids reader) that had several of the text features included. I gave the student this hand-out to complete after reading the text.
 I personally like this hand-out because it not only draws the student’s attention to what text features were used, but why those were used. This asks the student to be a critical thinker and active participant while reading.
Next week, I’ll post Part 2 of Nonfiction Text Features. Thanks for joining This Reading Mama on a literacy journey!
~Becky
hi
HI! Just so you know, your “how to make a fortune teller” link does to an inappropriate search result 🙂
Thank you! I fixed it. It’s not the exact text we used, but it may work if you print it off of their website.