 Thank you, Becky, for inviting me to write at This Reading Mama. My name is Dayna from Lemon Lime Adventures and I am a huge fan and truly honored to be here. Today I would like to share a quick and easy way to practice fluency with any age reader. Whether its in a classroom with 30 first graders, or at home with 3 homeschooling children, I have found it is imperative to have independent work stations for children that meet their needs. These DIY Fluency Boards do just that, and are quick and easy to make!
Making your Fluency Boards

What you need is simple:
* A Picture Frame ( I use one matted for an 8×10, so I don’t have to trim the paper)
* Blank Calendar Page or this printable version
* Dry Erase Markers
Simply place your calendar page into the frame.
Choose 7 Words to practice
Using your dry erase marker, write directly on the glass.
Write the words across the first week, with one word in each box.
On each repeating line, mix up the words (but use the same 7 words on each line).
Choosing Words for Fluency Boards
This can seem like the trickiest part. What words should you pick? How hard should they be? For us, I choose 7 words each child is working on in their “Just Right Book” for the week. However, there are several ways you could pick your words, so I have decided to list a few options for versatility. You can download a free premade bundled pack of fluency practice sheets from Lemon Lime Adventures.

For Pre-Readers
* Use shapes
* Colors
* Pictures
* Names of familiar people
For Emergent Readers
*Put letters of the alphabet in each box
*Use color words, written in corresponding colors
*Use Labels they are familiar with (Mom, Dad, Dog, Cat, etc…)
*Letters that look similar (b/d, q/p, m/n)
*Vowels
For Transitional or Fluent Readers
* Tricky words from any reading assignment
* Vocabulary words from a content area unit
*Use multisyllabic words with confusing word patterns.
Using Your Fluency Boards

-
After you have chosen your 7 words and filled in your calendar, it’s time for the fun to begin. My boys like it when I color code the words that are similar, this is optional.
-
Read through the words with your child one time slowly. This will ensure their confidence and help with them with anything they are stuck on.
-
Next, have your children read the words one time through slowly, pointing to each box. This will allow you to monitor their progress and their abilities, while allowing them freedom to feel independent.
-
Lastly, let your child read through the chart. You can use a kitchen timer to see how many they can read in 1 minute. You can let them go at their own pace. Remember, Fluency is how quickly, accurately, automatically and expressively someone reads a passage. So have fun! Read in a whisper voice. Read in a Papa Bear voice. Read in a scary voice. Mix it up!
The key here is to practice, practice, practice and build automaticity. I would love to hear if you try this activity on your own and hear how it went. What will you put in your readers chart? What was their favorite way to read it?
Download this FREE Sight Word Template for your own DIY Fluency Boards HERE!
Looking for More Reading and Writing Tips?
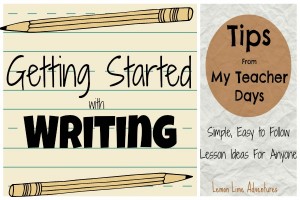
Getting Started with Writing
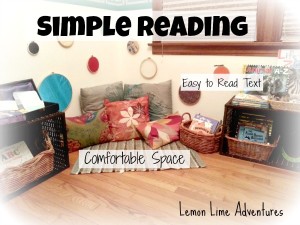
Simple Guided Reading Lesson
 Dayna is a National Board Certified teacher with over 12 years of experience in the primary classroom. She recently began homeschooling her 3 children against her will. She writes at Lemon Lime Adventures, where she writes about the trials and errors of their life, life living as a blended family, and dealing with a son with Sensory Processing Disorder. You can find Dayna rockin’ it over on Facebook, Twitter, Instagram, and G+!
Comments
Trackbacks
-
[…] Today I am over at This Reading Mama sharing a quick and easy way to practice Fluency with any age reader. Be sure to check out how to make your own DIY Fluency Boards that are quick and easy to make! […]
-
[…] fluency board is a combination of ideas I got from Sounds-Write and This Reading Mama. It’s a fun way to encourage accurate and fluent […]
Great idea! We used flash cards in a similar manner.
I am so happy you liked it! Flash cards can be great also. This is just one alternative to flashcards 🙂
Brilliant! I hope my children’s future teachers are as creative as you are.
What a sweet thing to say 🙂
Oh this is a great idea and I really love it! Good for even those that don’t homeschool!
I agree this great for home, school, or homeschool 🙂
What a wonderful idea!!
I LOVE this idea for pre-and emergent readers, and I really appreciate that this is something that almost ANYONE can easily put together that doesn’t cost an arm and a leg!
Thank you so much! I tried to make it adaptable to any level since I teach different grades at the same time in my home.
What a cool idea! My children are older, but I’d love to use these for the “tricky” words that seem to mess with us all! Thanks!
That would be a great idea!
This is a fantastic idea! Love that you included printables for all ages too.
Thank you! I am so happy you liked them!
This is such an awesome idea. My kindergartner needs something that will get him excited about his sight words and this may be it!
Wonderful! Let me know how they Like them!
What a great idea! I’ll share this with my s-i-l who homeschools her 3 boys!
Thank you so much! I hope she likes it too 🙂
What a great way to help with reading and make it interesting at the same time.
Wow! What a great idea!
What a great idea! I bet the kids love it too!
That’s really creative! We have lots of old picture frames around here that would work well for that.
Seriously, this is such a great idea!
This is a great way to help with sight words! I need to make these for my 1st grader!
This is a great idea! I need to get better at practicing sight words with my Kindergartener and this would be perfect!